Encrypted IOT Communication using MQTT protocol (Mosquitto broker and ESP8266)
MQTT is a machine-to-machine messaging protocol, designed to provide lightweight publish/subscribe communication to IOT devices. It is commonly used for geo-tracking fleets of vehicles, home automation, environmental sensor networks, and utility-scale data collection.
Mosquitto is a popular MQTT server (or broker) that has great community support and is easy to install and configure.
In this tutorial, we’ll install Mosquitto, setup our own Certificate Authority, generate certificates and set up our broker to use SSL to secure our MQTT communications.
Advantages Of MQTT Protocol
Some advantages of using MQTT protocol are:
- Good choice for wireless networks
- Information reliability
- Increased the scalability of the network
- Reduced bandwidth
- It is well suited for control and remote sensing
- Lightweight
- Uses permission-based security making it more secure
- Publish/subscribe protocol are able to collect more data by using less bandwidth as compared to other polling protocols.
- Maximize bandwidth which is available
MQTT Publisher/Subscriber
The first main concept in MQTT is a Publisher/ Subscriber system. A publisher device publishes a message on a specific topic and Subscriber device subscribe to the topic which will be sent by a publisher. On top of that, more than one device can subscribe to the topic.
MQTT – Messages
It is data or commands which we want to share between IoT devicess connected via a MQTT protocol.
MQTT- Topic
Topics are also a third significant concept to understand MQTT. In this protocol, multiple devices can subscribe to a publisher to receive specific messages according to their register interest. Topics define which device we want to publish a message.
How does MQTT Works?
First of all, a TCP / IP connection is initiated from client to broker by using a standard or custom port which is defined by a broker’s operation.
While establishing a connection, it’s important to recognize that whether the server has continued an old session or a new session.
The old session continued if reused client identity is provided to the broker.
Mosquitto MQTT Broker installation
sudo apt-get update
sudo apt-get install mosquitto
Setting up CA and generating certificates
Steps
- Create a CA key pair
- Create CA certificate and use the CA key from step 1 to sign it.
- Create a broker key pair without password protection.
- Create a broker/server certificate request using key from step 3
- Use the CA certificate to sign the broker certificate request from step 4.
- Now we should have a CA key file,a CA certificate file, a broker key file, and a broker certificate file.
- Place all files in a directory on the broker
- Copy the CA certificate file to the client.
- Edit the Mosquitto to use the files
- Setup the clients to use CA certificate for secure communications
Openssl Installation
sudo apt-get install openssl
Create a key pair for the CA
openssl genrsa -out ca.key 2048
Create a certificate for the CA using the CA key
openssl req -new -x509 -days 3650 -key ca.key -out ca.crt
Create a server key pair that will be used by the broker
openssl genrsa -out server.key 2048
Create a certificate request
openssl req -new -out server.csr -key server.key
Use the CA key to verify and sign the server certificate
openssl x509 -req -in server.csr -CA ca.crt -CAkey ca.key -CAcreateserial -out server.crt -days 3650
Copy the files ca.crt, serever.crt and server.key to a folder under the mosquitto folder and update mosquitto.conf file (/etc/mosquitto/mosquitt.conf)
listener 8883
cafile /etc/mosquitto/certs/ca.crt
certfile /etc/mosquitto/certs/server.crt
keyfile /etc/mosquitto/certs/server.key
Copy the CA certificate file ca.crt to the client.
To do a quick test, we can use the commands mosquitto_pub and mosquitto_sub from the command line to see if things are working as we expect.
mosquitto_sub -p 8883 -t "test" --cafile ca.crt -d -h myhostname.com
mosquitto_pub -p 8883 -t "test" --cafile ca.crt -m "Hello MQTT" -d
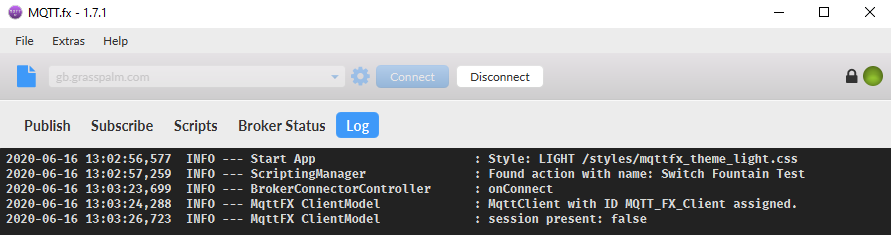
We can use MQTT.fx for testing the connectivity with MQTT broker
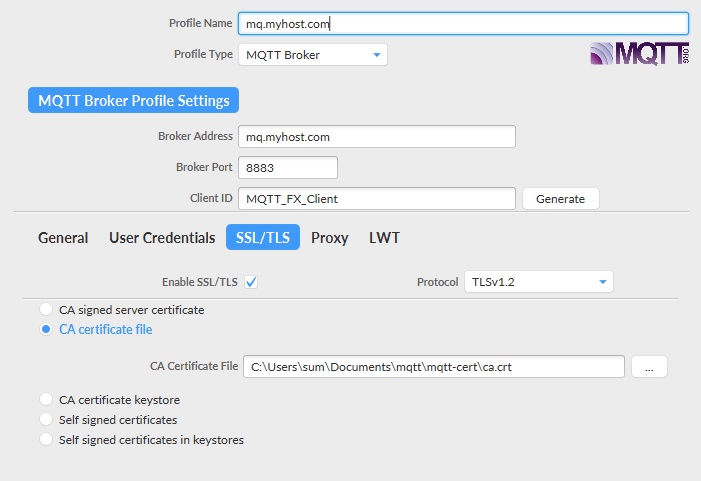
Connection Status
Setting up nodemcu for secure communication
we’ll create a WiFiClientSecure obejct to let us make TLS-encrypted connections. We’ll also include our base64-encoded PEM format CA cert and MQTT broker cert’s SHA1 fingerprint for validation.
The CA cert can be defined as so, below the includes/defines:
/* CA Cert in PEM format */
const char caCert[] PROGMEM = R"EOF(
-----BEGIN CERTIFICATE-----
MIIDsjCCApoCCQDdBbUe4hJN+zANBgkqhkiG9w0BAQsFADCBmTELMAkGA1UEBhMC
QkgxDzANBgNVBAgMBk1hbmFtYTEPMA0GA1UEBwwGTWFuYW1hMRIwEAYDVQQKDAlH
cmFzc3BhbG0xFjAUBgNVBAsMDUdyYXNzcGFsbS1JT1QxGTAXBgNVBAMMEGdiLmdy
YXNzcGFsbS5jb20xITAfBgkqhkiG9w0BCQEWEmluZm9AZ3Jhc3NwYWxtLmNvbTAe
Fw0yMDA2MTAxNjM3MzhaFw0zMDA2MDgxNjM3MzhaMIGbMQswCQYDVQQGEwJCSDEP
AAEwDQYJKoZIhvcNAQELBQADggEBAC+vI65BKPDrgMXaRebQTcdUiPtK+3EJVXVg
zw1kZ/rkAVn8cPUKK6xf3+6L+c7m06OQOvgwXA3VN3d/dc4nZuM/iZufObDWp8w0
j+m9n51cARVsRzEIdQSht4yVxAwg2KMB8a1X3hKtFljOH0GKj2N557U5bNNQ++5n
DYwgx2x3yEhEhNU2qTmCPsSlQEYRxRgj9aAP6mY1wdGTVnqfop9kIrFnY8uRdBLs
u83Eaf/lPlasmLeQUtp+PcMA6LcFgjJQS9Eai2KPyOLJq4fiD0gwKiVyUL59NDWk
hT7QcVOFigVj0nm9QdO9KbTO2dIIymCmr0sXDer3Z3GeL8ZwWbk=
-----END CERTIFICATE-----
)EOF";
We also include a byte array to match against the MQTT broker cert SHA1 fingerprint we extracted earlier, and some globals needed by the WiFiClientSecure class to establish secure connections using the supplied CA cert and MQTT broker cert fingerprint
To get the fingerprint :
openssl x509 -noout -fingerprint -sha1 -inform pem -in server.crt

SHA1 Fingerprint=61:5B:5A:B9:AF:35:79:AA:21:09:04:5C:C2:32:43:6C:57:CC:8C:F4
Byte array defenition:
const uint8_t mqttCertFingerprint[] = {0x61,0x5B,0x5A,0xB9,0xAF,0x35,0x79,0xAA,0x21,0x09,0x04,0x5C,0xC2,0x32,0x43,0x6C,0x57,0xCC,0x8C,0xF4};
We will use the Arduino Client (https://github.com/knolleary/pubsubclient) for MQTT to enable connection from our ESP8266 to the MQTT broker using our now-secure TLS connection.
Here I assume that ESP8266 is already setup with Arduino IDE and you are able to simple sketches like this and monitor the output using serial monitor.
// Import required libraries
#include <ESP8266WiFi.h>
// WiFi parametersGetting Started with the ESP8266
constchar* ssid = "your_wifi_name";
constchar* password = "your_wifi_password";
void setup(void)
{
// Start Serial
Serial.begin(115200);
// Connect to WiFi
WiFi.begin(ssid, password);
while (WiFi.status() != WL_CONNECTED) {
delay(500);
Serial.print(".");
}
Serial.println("");
Serial.println("WiFi connected");
// Print the IP address
Serial.println(WiFi.localIP());
}
void loop() {
}
Entire working code:
#include <ESP8266WiFi.h>
#include <PubSubClient.h>
#define ESP8266_LED (5)
#define RELAY_SIGNAL_PIN (4)
#define SERIAL_DEBUG
#define TLS_DEBUG

WiFiClientSecure espClient;
PubSubClient mqttClient(espClient); /* MQTT Client connection */
String clientId = "ESP8266Client-"; /* MQTT client ID (will add random hex suffix during setup) */


/* CA Cert in PEM format */
const char caCert[] PROGMEM = R"EOF(
-----BEGIN CERTIFICATE-----
MIIDsjCCApoCCQDdBbUe4hJN+zANBgkqhkiG9w0BAQsFADCBmTELMAkGA1UEBhMC
QkgxDzANBgNVBAgMBk1hbmFtYTEPMA0GA1UEBwwGTWFuYW1hMRIwEAYDVQQKDAlH
cmFzc3BhbG0xFjAUBgNVBAsMDUdyYXNzcGFsbS1JT1QxGTAXBgNVBAMMEGdiLmdy
YXNzcGFsbS5jb20xITAfBgkqhkiG9w0BCQEWEmluZm9AZ3Jhc3NwYWxtLmNvbTAe
Fw0yMDA2MTAxNjM3MzhaFw0zMDA2MDgxNjM3MzhaMIGbMQswCQYDVQQGEwJCSDEP
AAEwDQYJKoZIhvcNAQELBQADggEBAC+vI65BKPDrgMXaRebQTcdUiPtK+3EJVXVg
zw1kZ/rkAVn8cPUKK6xf3+6L+c7m06OQOvgwXA3VN3d/dc4nZuM/iZufObDWp8w0
j+m9n51cARVsRzEIdQSht4yVxAwg2KMB8a1X3hKtFljOH0GKj2N557U5bNNQ++5n
DYwgx2x3yEhEhNU2qTmCPsSlQEYRxRgj9aAP6mY1wdGTVnqfop9kIrFnY8uRdBLs
u83Eaf/lPlasmLeQUtp+PcMA6LcFgjJQS9Eai2KPyOLJq4fiD0gwKiVyUL59NDWk
hT7QcVOFigVj0nm9QdO9KbTO2dIIymCmr0sXDer3Z3GeL8ZwWbk=
-----END CERTIFICATE-----
)EOF";

/* MQTT broker cert SHA1 fingerprint, used to validate connection to right server */
const uint8_t mqttCertFingerprint[] = {0x61,0x5B,0x5A,0xB9,0xAF,0x35,0x79,0xAA,0x21,0x09,0x04,0x5C,0xC2,0x32,0x43,0x6C,0x57,0xCC,0x8C,0xF4};

/* Other globals */
X509List caCertX509(caCert);        /* X.509 parsed CA Cert */
//WiFiClientSecure espClient;         /* Secure client connection class, as opposed to WiFiClient */

#ifdef TLS_DEBUG
/* verifytls()
 *  Test WiFiClientSecure connection using supplied cert and fingerprint
 */
bool verifytls() {
  bool success = false;

#ifdef SERIAL_DEBUG
  Serial.print("Verifying TLS connection to ");
  Serial.println("mymqtthostwithtls.com");
#endif

  success = espClient.connect("mymqtthostwithtls.com", 8883);

#ifdef SERIAL_DEBUG
  if (success) {
    Serial.println("Connection complete, valid cert, valid fingerprint.");
  }
  else {
    Serial.println("Connection failed!");
  }
#endif

  return (success);
}
#endif

void reconnect() {
  /* Loop until we're reconnected */
  while (!mqttClient.connected()) {
#ifdef SERIAL_DEBUG
    Serial.print("Attempting MQTT broker connection...");
#endif
    /* Attempt to connect */
    if (mqttClient.connect(clientId.c_str())) {
#ifdef SERIAL_DEBUG
      Serial.println("connected");
#endif
      /* Once connected, resubscribe */
      mqttClient.subscribe("test001");
    }
    else {
#ifdef SERIAL_DEBUG
      Serial.print("Failed, rc=");
      Serial.print(mqttClient.state());
      Serial.println(". Trying again in 5 seconds...");
#endif
      /* Wait 5 seconds between retries */
      delay(5000);
    }
  }
}


void setup()
{
  /* Set board's GPIO pins as an outputs */
  pinMode(RELAY_SIGNAL_PIN, OUTPUT);
  pinMode(ESP8266_LED, OUTPUT);

#ifdef SERIAL_DEBUG
  /* Initialize serial output for debug */
  Serial.setDebugOutput(true);
  Serial.begin(9600, SERIAL_8N1);
  Serial.println();
#endif

  /*  Connect to local WiFi access point */
  WiFi.mode(WIFI_STA);
  WiFi.begin("myssid", "mypassword");

#ifdef SERIAL_DEBUG
  Serial.print("Connecting");
#endif
  while (WiFi.status() != WL_CONNECTED)
  {
    delay(500);
#ifdef SERIAL_DEBUG
    Serial.print(".");
#endif
  }
#ifdef SERIAL_DEBUG
  /* When WiFi connection is complete, debug log connection info */
  Serial.println();
  Serial.print("Connected, IP address: ");
  Serial.println(WiFi.localIP());
#endif

  /* Configure secure client connection */
  espClient.setTrustAnchors(&caCertX509);         /* Load CA cert into trust store */
  espClient.allowSelfSignedCerts();               /* Enable self-signed cert support */
  espClient.setFingerprint(mqttCertFingerprint);  /* Load SHA1 mqtt cert fingerprint for connection validation */

  /* Optionally do none of the above and allow insecure connections.
   * This will accept any certificates from the server, without validation and is not recommended.
   */
  //espClient.setInsecure();

#ifdef TLS_DEBUG
  /* Call verifytls to verify connection can be done securely and validated - this is optional but was useful during debug */
  verifytls();

#endif

  /* Configure MQTT Broker settings */
  mqttClient.setServer("mymqtthostwithtls.com",8883);
  mqttClient.setCallback(subCallback);

  /* Add random hex client ID suffix once during each reboot */
  clientId += String(random(0xffff), HEX);


}

void loop()
{

  /* Main loop. Attempt to re-connect to MQTT broker if connection drops, and service the mqttClient task. */
  if(!mqttClient.connected()) {
    reconnect();
  }
  mqttClient.loop();

}

void subCallback(char *topic, byte *payload, unsigned int length)
{


  Serial.print("Message arrived in topic: ");
  Serial.println(topic);

  Serial.print("Message:");
  for (int i = 0; i < length; i++) {
    Serial.print((char)payload[i]);
  }

  Serial.println();
  Serial.println("-----------------------");

}
Once the connection is established to the broker, a callback function mqttClient.setCallback(subCallback);, will be initiated and processed on reception of messages on the subscribed topic (test001) and the message will be displayed on serial console. There are lots of Serial print statements in the program, you can remove those if not required.