Active Directory Security Event Analysis using LogonTracer
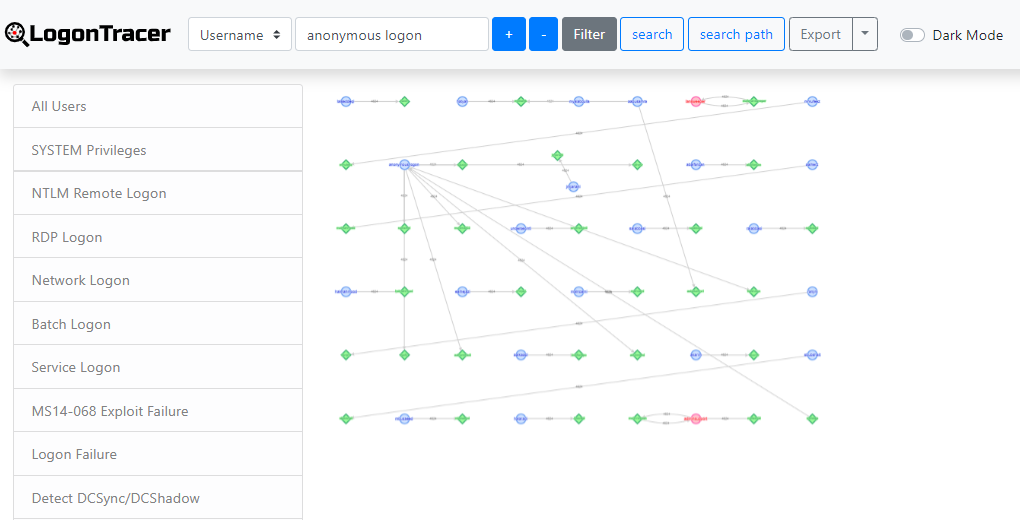
LogonTracer associates a host name (or an IP address) and account name found in logon-related events and displays it as a graph and it is possible to see in which account login attempt occurs and which host is used. LogonTracer creates graphs, which shows the relations of some IP addresses and accounts.
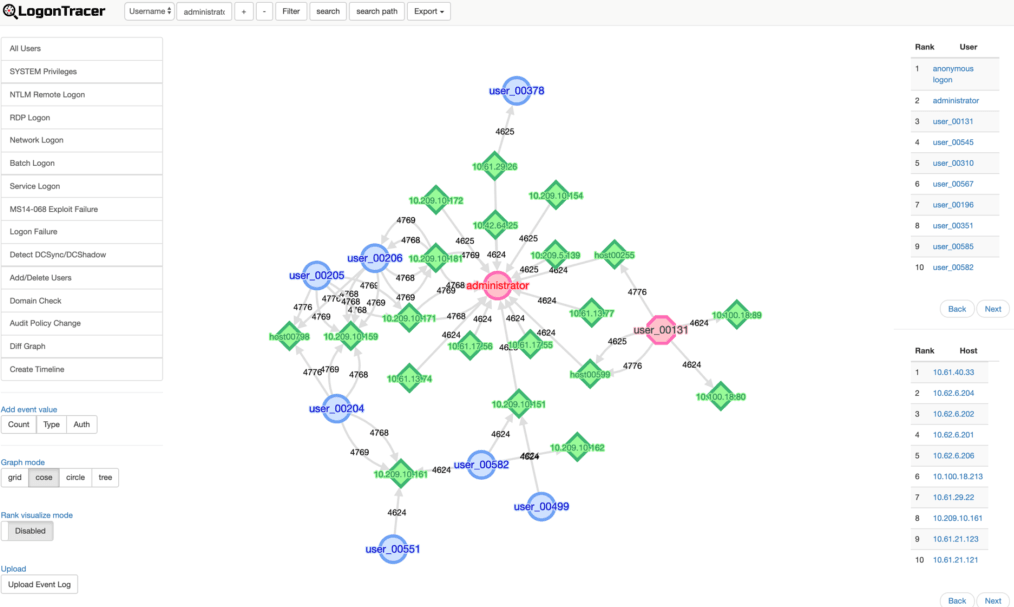
For this ranking, LogonTracer performs network analysis on the event log graph, and creates a ranking based on the “centrality” of each node. Centrality is an index which indicates each node’s proximity to the centre in a network. For calculation of centrality, PageRank [1] is applied. In this algorithm, nodes that have connection to many other nodes are located towards the centre of the graph and therefore have a higher centrality.
As compromised accounts are used to perform login attempts to many hosts, they tend to have a higher centrality. Consequently, by comparing the centrality, possibly affected accounts/hosts can be identified.
Node details
 SYSTEM privileges account
- Standard user account
- IP address and host
 SYSTEM privileges account
 Standard user account
 IP address and host
Setup LogonTracer on Ubuntu 19.04
root@sec01:/home/admin#lsb_release -a
No LSB modules are available.
Distributor ID: Ubuntu
Description: Ubuntu 19.04
Release: 19.04
Codename: disco
LogonTracer loads the graph from Neo4j. Neo4j should be installed prior setting up LogonTracer.
Install Neo4j
Please check the Neo4j web site and install Neo4j.
https://neo4j.com/docs/operations-manual/current/installation/linux/debian/
sudo apt-get install neo4j=1:4.0.3
Change Neo4j configuration to allow remote access
root@sec01:/home/admin# vim /etc/neo4j/neo4j.conf
# Bolt connector
dbms.connector.bolt.enabled=true
#dbms.connector.bolt.tls_level=DISABLED
dbms.connector.bolt.listen_address=0.0.0.0:7687

# HTTP Connector. There can be zero or one HTTP connectors.
dbms.connector.http.enabled=true
dbms.connector.http.listen_address=0.0.0.0:7474
Save the configuration and restart the service
systemctl restart neo4j
Next up, connect to the server at http://192.168.0.40:7474 and login to the UI for neo4j. (192.168.0.40 is my server IP)
Using the default credentials of username “neo4j” and password “neo4j”. You can change the password at the first login.
Clone LogonTracer
git clone https://github.com/JPCERTCC/LogonTracer.git
From LogonTracer folder
pip3 install -r LogonTracer/requirements.txt
Once the requirements are installed start the LogonTracer
root@sec01:/home/admin/LogonTracer# python3 logontracer.py --run --port 8877 --user neo4j --password 'newpass' --server 192.168.0.40
These different arguments are:
–run: Launch web server
–port: Port number where the web server operates – In my case this is “8877”
–user: Neo4j username – In my case this user is “neo4j”
–password: Neo4j password – In my case this is “newpass”
–server: Address where the web server operates – In my case this is “192.168.0.40”
Now that the server is running, let’s now access it using our browser.
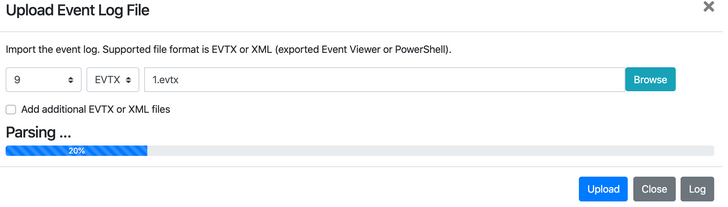
Using the “Upload Event Log” at the bottom left hand side of the screen, we are able to provide our Security Event log. We can upload this in either of two formats. Either the raw .evtx file or we can use the Windows Event Viewer and export these logs as XML. It is recommended that you convert your .EVTX file to .XML by exporting the security events from the Windows Event Viewer or some other tool.